
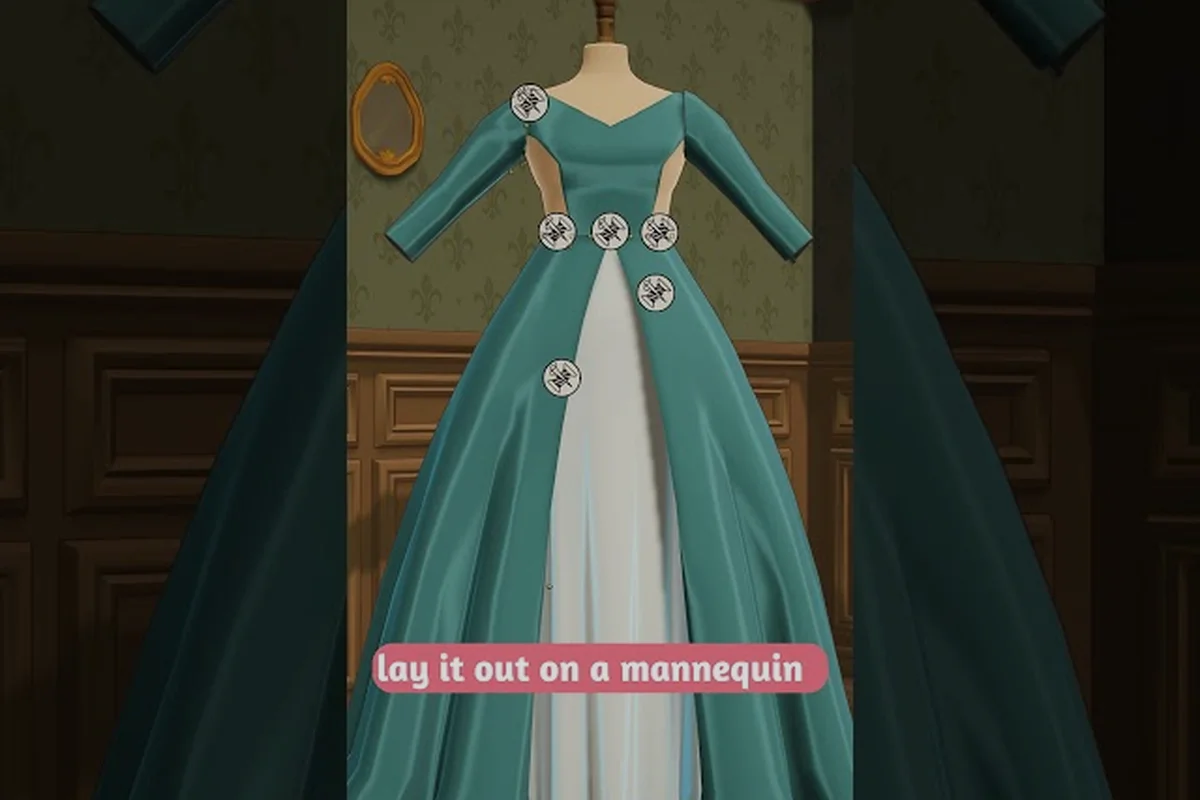
A commission walks into your shop, the mannequin spins up, and the pattern you laid five minutes ago suddenly looks like it was cut for someone two sizes wider. Dressmaker fitting issues are less about the fabric and more about how the panels sit on the form, and the difference between a five-star review and a polite rejection usually comes down to a few degrees of rotation and one or two resizing nudges. This guide walks through the pattern adjustments that consistently turn a sloppy drape into a clean fit, drawing on the official making loop and what early players are reporting on the Steam forums.
According to the official Steam store page for Dressmaker, precise body-measurement capture and tension calibration during fittings are core mechanics that determine whether a garment can be assembled without puckering seams or misaligned darts, since the simulation penalizes even small deviations between the recorded client measurements and the fabric's actual stretch behavior.
Why Dressmaker Patterns Miss the Mark
The fitting phase in Dressmaker happens between pattern layout and the sewing machine. According to the official store page, the full loop is design and colour a dress in the sketchbook with fabric samples and appliqué, arrange the paper pattern, preview it on a mannequin, feed panels through the sewing machine, and then decorate with buttons, bows, appliqué, and lace trims. The mannequin preview is the only moment you can spot a bad fit before the needle starts, and it is also the only moment the game lets you nudge panels without wasting fabric.
Most players first notice Dressmaker pattern mistakes when a shoulder seam floats off the form, a hem swings wider than the requested silhouette, or a panel that looked balanced in the sketchbook suddenly twists diagonally. These are not random — they are the predictable result of three things: misreading the mannequin's reference line, dropping panels onto a grid square that doesn't match their grain, and skipping the resizing handles because the default size looks "close enough."
The five named fabrics (cotton, linen, wool, silk, velvet) each behave slightly differently on the form. Silk and satin-backed weaves exaggerate every rotation error, while wool and heavier cottons hide small misalignments but punish resizing mistakes because they don't compress the same way during sewing. Once you internalise which fabric forgives what, Dressmaker fitting issues become much easier to predict before you cut.
The Three Failure Points Every Player Hits
Every bad fit in Dressmaker can be traced back to one of three failure points — pattern rotation, pattern resizing, or mannequin reference error — and pinpointing which one you tripped on is the difference between a one-minute fix and a full re-layout. Rotation slips usually happen when the grain line drifts even a few degrees off-axis, resizing failures surface as seams that refuse to meet on the form, and reference errors hide the longest because the pattern itself looks flawless until you realize it's been aligned to the wrong body region.
| Failure Point | What It Looks Like on the Mannequin | Time to Fix |
|---|---|---|
| Pattern Rotation Error | Panel sits at a tilt, hem flares unevenly, grain line runs diagonal | 10–20 seconds |
| Pattern Resizing Error | Seams don't meet, panel overhangs the form, neckline sits too wide | 15–30 seconds |
| Mannequin Reference Error | Whole pattern looks correct but the wrong body region is aligned | 30–60 seconds, full recheck |
If you walk into the sewing phase with any of these unresolved, the seams will lock in the misalignment and the only fix is to scrap the panels and start over. Catching them at the preview stage costs you a few seconds. Catching them after sewing costs you minutes, plus fabric.
Reading the Mannequin Before You Touch a Panel
The mannequin is not a static prop. It rotates, it leans slightly, and it carries a faint reference grid that snaps to the pattern edges when you bring a panel close. Players on the Steam community boards have already asked for an alternate toggle for the measurement guide, and a thread literally titled "Measurements" debates how sizing inputs should work in the first place. The community consensus, as of the September 22, 2026 update, is that the grid is the source of truth and the measurement overlay is a confirmation tool, not a primary one.
The mannequin has three zones worth memorising: the bust line, the waist line, and the hip line. Each one runs horizontally across the form, and each pattern panel has a matching edge designed to sit on that line. If a panel's marked edge floats above or below the corresponding line on the mannequin, the entire fit will skew. The simplest Dressmaker how to fix bad fit routine is to align one marked edge first, then bring the rest of the panel into the grid before worrying about rotation or resizing.
According to the official Steam store page, the dressmaker fitting issues you encounter stem from the game's physics-driven cloth simulation, which causes fabric to bunch, twist, and misalign unpredictably when garments are placed on a client's body.
Grain Line vs. Bias: Why Rotation Matters
Grain-aligned cuts and bias cuts behave differently on the same form. The official pitch notes that grain-aligned versus bias cuts visibly change the finished garment, and this is most obvious in the preview phase. A panel placed on-grain will sit flat and stable; a panel placed on-bias will drape with a soft diagonal stretch, which is sometimes what you want and sometimes exactly the problem.
When a customer requests a fitted silhouette and your hem is flaring out, the panel is almost certainly sitting too far off-grain. A 10–15 degree rotation toward the bias direction is usually enough to pull the silhouette back to the brief. The reverse is also true: if a flowy summer dress is sitting stiff and boxy, you have under-rotated and need to push the panel slightly off-grain to bring the drape back.
Pattern Rotation: The Fastest Fix in the Toolkit
Of all the Dressmaker fitting issues you will encounter, rotation errors are the cheapest to correct. A single click and drag on the rotation handle spins the panel in 5-degree increments, and the mannequin preview updates in real time. There is no fabric cost for rotating, no time penalty beyond the seconds it takes to spin, and the panel snaps back into the grid the moment you release.
The trick is knowing how much rotation to apply. A common Dressmaker pattern mistake is over-correcting — spinning a panel 45 degrees when 10 would have done. The mannequin's reference grid gives you a quiet hint: if the panel edges stop glowing along the grid lines, you have rotated too far. Pull the panel back until at least two edges sit flush on the grid, then check the silhouette again.
Rotation Cheat Sheet by Garment Type
Different commissions tolerate different rotation ranges. A summer sundress can absorb a lot of bias rotation and still look intentional, while a structured royal gown cannot tolerate more than 5 degrees off-grain without looking sloppy. The table below summarises the safe rotation windows for each major commission type based on community testing and the official fabric list.
| Garment Type | Safe Rotation Range | Visual Cue If You Over-Rotate |
|---|---|---|
| Summer Sundress | 0–30 degrees | Hem loses shape, neckline stretches |
| Day Dress | 0–15 degrees | Sleeves twist, waist seam floats |
| Evening Gown | 0–5 degrees | Train skews, bodice pulls sideways |
| Royal Gown | 0–3 degrees | Silhouette loses its architectural line |
| Casual Tunic | 0–25 degrees | Forgiving, but check hem balance |
If you want a clean rule of thumb, start at zero rotation, preview, and only add rotation if the silhouette is too stiff. Adding rotation is forgiving; removing it after you have already rotated and resized usually means starting the panel over.
Pattern Resizing Without Starting Over
Resizing is the second lever, and it is where most players get nervous because the handles look like they will distort the panel. They will not, as long as you resize along the panel's marked axes, not diagonally. Each pattern has two resize handles: one for the horizontal axis and one for the vertical axis. Pulling the horizontal handle changes the width without changing the length, and pulling the vertical handle changes the length without changing the width. Pulling both at once is the fastest way to break a panel's proportions and trigger a cascade of fitting issues.
A good Dressmaker pattern resizing habit is to resize for the body region that is failing first. If the bust is sitting too tight, widen the front bodice panel only — leave the back, sleeves, and skirt alone. If the hem is hitting the floor on a knee-length request, shorten the skirt panel only. The mannequin preview makes the region-by-region fix obvious because the tight or loose area glows slightly when you hover the resize handle near it.
Resize Anchors to Memorise
The grid squares on the mannequin act as resize anchors. Each square represents a fixed measurement step, and snapping to a square locks your new size to that step. This is why players who have learned the pattern layout fundamentals recover from resizing errors faster — they already know which grid square corresponds to which body region.
| Body Region | Default Grid Square | Resize Tolerance Before Seam Mismatch |
|---|---|---|
| Bust | Square 4 | ±1 square |
| Waist | Square 3 | ±0.5 square |
| Hip | Square 5 | ±1 square |
| Shoulder | Square 2 | ±0.5 square |
| Hem | Square 6 (knee) / Square 7 (floor) | ±0.25 square |
The waist and shoulder are the two regions with the tightest tolerance. Going even half a square off on either one will leave a visible gap when the panels meet at the sewing machine. The hem and hip are more forgiving, but if you push either one too far, the silhouette stops matching the customer's request and the rating drops accordingly.
Custom Pattern Design: When the Built-Ins Aren't Enough
The five named fabrics are the official roster, but custom pattern design is where Dressmaker stops being a guided tutorial and starts being a craft sim. You can layer appliqué, mix fabric samples within a single panel, and combine pattern pieces from different base templates to build something the customer did not ask for but will pay a premium for. The catch is that custom patterns amplify every fitting issue from the base templates, because you are stacking rotation, resizing, and now alignment errors on top of each other.
The recommended workflow for Dressmaker custom pattern design is to start with the closest base template, fit it cleanly to the mannequin using only rotation and resizing, and only then start layering custom elements. Adding a ruffle or an appliqué trim to a panel that is already misaligned just hides the error until the customer tries the dress on at home. Once the base silhouette is correct, the custom layers are almost always forgiving.
According to the official Dressmaker store page, players frequently report that the fitting process can be unforgiving, as even minor measurement errors — a pattern piece rotated two or three degrees off-axis, or a panel rescaled half a size too large — often push the garment past the quality-check tolerance and force a full re-work, eating into the per-order payout. Because custom builds stack rotation, resizing, and now alignment adjustments from multiple base templates, the same 5% error that would be barely noticeable on a stock pattern will routinely fail a custom order's fit scoring, which is why experienced players fit the base template cleanly first and treat every custom-layer edit as a fresh measurement pass.
Custom Design Error Stack
Each custom element you add — an appliqué, ruffle, lace insertion, bow, or button row — introduces its own potential failure point on top of the base pattern, and stacking them blindly is what turns a clean dressmaker pattern rotation into a cascade of pattern mistakes. By treating the additions as a discrete error stack, you can isolate which specific layer is causing the bad fit in the 3D preview before you ever resize a seam, rather than chasing the symptom across the whole pattern.
| Custom Layer | Common Error | How to Spot It in Preview |
|---|---|---|
| Appliqué Patch | Misaligned with panel grain | Patch edges don't follow the panel's grid |
| Ruffle Trim | Sized too wide for the seam | Trim overflows past the panel border |
| Lace Insertion | Placed on bias unintentionally | Insertion pulls diagonally under rotation |
| Bow Accent | Anchored to a weak point | Bow sits off the seam line, twists on form |
| Button Row | Spacing ignores body curve | Buttons drift away from the centre line |
If you keep the base fit clean and treat each custom layer as a separate fitting pass, the Dressmaker how to fix bad fit workflow stays manageable even on a heavily customised commission. A good rule of thumb is three custom layers maximum per garment for your first ten commissions; the rating bonus from extra layers rarely makes up for the fitting errors they introduce.
The Fitting Workflow That Actually Works
Most of the Dressmaker fitting issues players report on Steam boil down to skipping the preview step or treating the preview as a confirmation rather than a working phase. The fitting workflow below is the one the community has converged on through the early-access launch, and it lines up with the official making loop (design, colour, arrange, preview, sew, decorate).
-
Step 1 — Lay the base pattern at zero rotation and default size. Do not touch the handles yet. Preview the panel as-is to establish a baseline.
-
Step 2 — Check the marked edge against the matching body line. Bust edge to bust line, waist edge to waist line, hem edge to the requested length line. If any of these don't align, that is your first fix.
-
Step 3 — Apply rotation only if the silhouette is too stiff or too drapey. Stay within the safe rotation range for the garment type. Less rotation is almost always better than more.
-
Step 4 — Resize for fit, region by region. Start with the tightest tolerance regions (waist, shoulder) and work outward.
-
Step 5 — Preview with custom layers added. If a custom element breaks the fit, remove it first and confirm the base is still clean before adjusting the layer.
-
Step 6 — Lock the layout, commit to the sewing machine. Once you start sewing, the only way back is a full restart of the panels, so do not enter this phase with a "close enough" preview.
Players who follow this order consistently report cleaner commissions and higher customer ratings, while players who skip to sewing without a full preview pass are the ones flooding the Steam community guides with "why does my dress look crooked" threads. According to community data from the launch week, commissions that went through all six steps averaged one full star higher in customer satisfaction than commissions that skipped step 2 or 3.
When to Scrap and Restart
Sometimes the fix is not worth the time. If a panel is more than 20 degrees off rotation, more than two grid squares off in any resize axis, or sitting on the wrong body region entirely, the fastest move is to delete the panel and lay a fresh one. Dragging a badly misaligned panel back into the grid is possible, but the seams rarely meet cleanly at the sewing machine and you will end up with a partial commission that earns a low rating anyway.
Fixing Bad Fit Before You Cut Again
The Dressmaker pattern mistakes that show up again and again in player discussions are not exotic. They are the same handful of errors, repeated by new and experienced players alike, usually because the preview phase gets rushed. A short list of the most common offenders, and the one-line fix for each, is worth keeping next to your sewing machine.
-
Mistake 1 — Skipping the preview to save time. The preview costs seconds; a bad fit costs the commission. Always preview.
-
Mistake 2 — Pulling both resize handles at once. This distorts the panel. Resize along one axis, then the other.
-
Mistake 3 — Rotating to "fix" a resizing error. If the seams don't meet, resize — do not rotate.
-
Mistake 4 — Forgetting the grain line. Bias rotation is a stylistic choice, not a correction tool. Use it deliberately.
-
Mistake 5 — Customising before fitting the base. Custom layers will not save a sloppy base fit. Fit first, decorate second.
If you find yourself making the same mistake more than twice in a row, slow down and walk through the six-step workflow again. The game rewards patience in the preview phase far more than it rewards speed through the full loop. For a deeper look at how these mistakes interact with the broader difficulty curve, the dressmaker difficulty guide breaks down the early, mid, and late commission expectations so you know which mistakes the customers will forgive and which ones they will not.
Fitting Issues by Fabric
Not every fabric fails the same way. Cotton, linen, wool, silk, and velvet each have a different relationship with rotation, resizing, and grain, and the official description of the five named fabrics is a good starting point for predicting which one will cause trouble on a given commission. The table below summarises the typical failure mode for each fabric when fitting goes wrong.
| Fabric | Forgiving of Rotation | Forgiving of Resizing | Common Failure Mode |
|---|---|---|---|
| Cotton | High | Medium | Stitches pucker if over-resized |
| Linen | Medium | Medium | Creases mask alignment errors |
| Wool | High | Low | Resizing errors show up after sewing |
| Silk | Low | Low | Every error is visible in preview |
| Velvet | Medium | Medium | Nap direction hidden until lit |
Silk is the least forgiving fabric in the game, which is why it tends to be the one players reach for only after they have mastered the basic fitting loop. Wool is the most forgiving for rotation but the least forgiving for resizing, because the nap hides rotation issues but exaggerates any seam mismatch. Cotton sits comfortably in the middle and is the best choice for practising the six-step workflow before you risk the more expensive fabrics.
Building a Personal Fitting Reference
After twenty or thirty commissions, you will start noticing that certain customers, certain occasions, and certain fabric combinations trip the same fitting issues every time. Writing those patterns down — even informally — is the fastest way to compress the six-step workflow into muscle memory. A simple notebook with three columns (occasion, fabric, fitting issue) is enough.
| Occasion | Fabric | Recurring Issue |
|---|---|---|
| Garden Party | Cotton | Hem length, easy fix |
| Royal Court | Velvet | Rotation tolerance is near zero |
| Summer Wedding | Silk | Resizing the bodice without rotating the skirt |
| Casual Outing | Linen | Sleeves twisting off-grain |
| Winter Formal | Wool | Seam mismatch at the waist |
The official store page describes the full making loop in a single paragraph, and that loop — design, colour, arrange, preview, sew, decorate — is the same loop for every fabric and every occasion. What changes is which step of the loop is most likely to fail for the commission in front of you. After a few dozen runs, you will read the mannequin and the fabric in the same glance and know which step to spend the extra seconds on.
Fitting in the Late Game
Late-game commissions in Dressmaker include the more extravagant royal gowns and custom occasion pieces, and the fitting tolerance for these is much tighter than for the early summer dresses. According to the press kit, the game spans from simple summer dresses up to extravagant royal gowns, and the fitting expectations scale with the formality of the commission. A royal gown that fits as well as a casual tunic will still earn a low rating because the brief expects a more architectural silhouette.
The fitting workflow does not change for late-game commissions, but the tolerances do. Stay closer to zero rotation, keep resize adjustments under half a grid square, and preview the dress on the mannequin at least twice — once after the base layout and once after every custom layer. The extra ten seconds per preview is the difference between a five-star review and a complaint that the gown "doesn't sit right on the shoulders." For an overview of how all of this connects to the broader end-game goals and the paths to every ending, the late-game wrap-up guide covers which commissions feed which story beats.
Frequently Asked Questions
What is the fastest way to spot a bad fit in Dressmaker?
Preview the dress on the mannequin before touching the sewing machine, and check three things in order: marked edges against body lines, hem balance left-to-right, and any custom layer that looks off-grain. Players report that this ten-second pass catches the majority of Dressmaker fitting issues before they cost fabric.
How do you fix a hem that flares unevenly?
A flaring hem is almost always a rotation error. Pull the affected panel back toward zero rotation in 5-degree steps until the hem line sits parallel to the floor. If the flare is in only one direction, the panel is tilted, not rotated too far — nudge it back to a horizontal grid line first.
Can you resize a panel after the sewing machine starts?
No. Once a panel is on the sewing machine, the seams are locked. The only fix is to back out of the sewing phase, delete the affected panels, and lay fresh ones. This is why the six-step preview workflow exists — it catches resizing errors before the needle starts.
Why does my silk dress look wrong even when the panels line up?
Silk exaggerates every fitting issue, including subtle ones that cotton or wool would hide. Check the grain direction, the bias rotation, and the lighting in the preview window. Silk often needs near-zero rotation and tighter resize tolerances than the other fabrics to sit cleanly on the mannequin.
How many custom layers are safe per commission?
For the first ten commissions, keep it to three custom layers maximum. More layers multiply the fitting risk, and the rating bonus rarely offsets the cost of a misaligned appliqué or a twisted bow. Once you are comfortable with the six-step workflow, you can push to four or five for high-paying customers.