
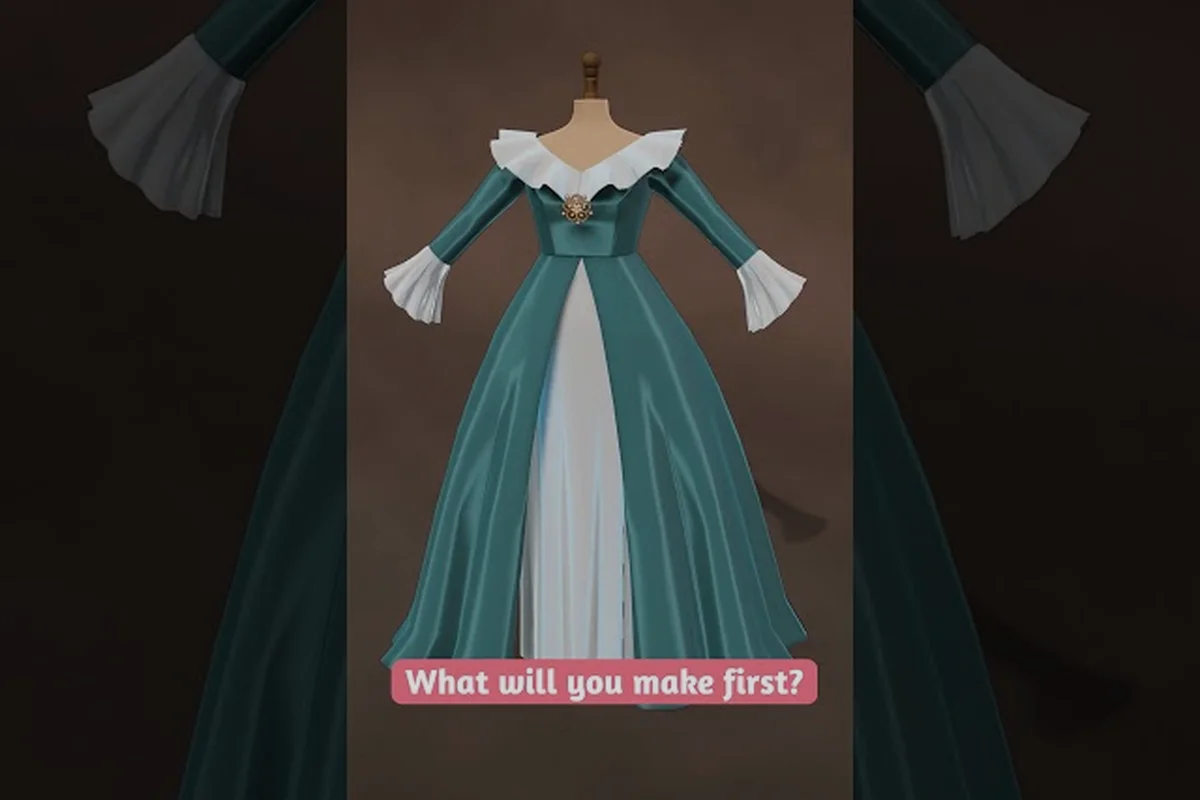
A correct dressmaker bodice pattern decides whether a finished gown hangs clean on the mannequin or twists out of shape after sewing. Learn why the bodice anchors every sleeve and skirt pairing before you place a single piece on fabric.
Understanding the Dressmaker Bodice Pattern
A well-built Dressmaker bodice pattern is the anchor of every dress you assemble in the game. According to the official Dressmaker Steam page, the making loop begins in the sketchbook where you design a dress, then moves to the pattern-arrangement table before panels ever touch the sewing machine. That sequence is why the bodice pattern is the first thing every new player should learn: it dictates how every sleeve, skirt, and trim connects to the torso piece, and a misaligned bodice ruins everything downstream. The bodice itself is a fitted upper-body shell with a center-front, center-back, two side panels, and shoulder darts that determine the silhouette of the final dress. When you understand how the Dressmaker bodice pattern interacts with the other pieces on the cutting mat, you stop guessing and start producing repeatable fits.
Players new to dress construction often skip straight to the decorative phase — appliqué, bows, lace — and then wonder why a finished dress looks "off" on the mannequin. The root cause is almost always pattern placement: a bodice placed against the wrong grain, or a sleeve set rotated ten degrees off-axis, propagates a visible twist into the final garment. The bodice is also the only piece that connects to nearly every other section, so mastering its placement first pays dividends across every commission.
Core Bodice Pieces at a Glance
The bodice is rarely a single panel. In the pattern-arrangement view, it is broken into pieces that must be rotated, flipped, and packed tightly against the fabric grain. The table below summarizes the four pieces you will see most often when building a basic bodice.
| Piece | Shape | Function | Common Pitfall |
|---|---|---|---|
| Center Front (CF) | Mirror-symmetrical half-panel | Forms the front closure and neckline | Forgetting to mirror when placing on fold |
| Side Front (SF) | Curved trapezoid | Shapes the bust curve and underarm | Placing on cross-grain by mistake |
| Center Back (CB) | Mirror-symmetrical half-panel | Carries the zipper line and back neck | Ignoring the grain arrow direction |
| Side Back (SB) | Tapered panel | Smooths the waist-to-shoulder transition | Overlapping the CB seam allowance |
These four pieces form the minimum viable bodice for a fitted top. Once a customer requests a sleeveless summer dress, the bodice is paired directly with a skirt block. The moment a sleeve is added, the underarm curve of the SF and SB must align with the sleeve cap — which is why the pattern pieces explained walkthrough is worth studying before you place your first sleeve.
Sleeve and Skirt Pattern Pairings
The bodice is the structural core, but the personality of a dress lives in the sleeve and skirt you pair with it. Each sleeve and skirt block in Dressmaker has its own grainline arrow, and ignoring that arrow is the most common reason a sleeve "twists" on the mannequin. A properly aligned Dressmaker sleeve pattern reads parallel to the selvage; a misaligned one reads at a 15- or 45-degree angle and will look twisted once stitched.
The Dressmaker skirt pattern follows a similar logic. A-line and pencil skirts both start from a waistline block that must mate with the bottom edge of the bodice. If the bodice waist measures 70 cm on the mannequin but the skirt waist measures 72 cm on the pattern, the finished dress will pucker at the join — even when every seam is technically straight. Treating the bodice and skirt as a single combined unit during placement avoids that mismatch.
Sleeve Variations and Their Use Cases
Different commissions call for different sleeves, and the pattern-arrangement view treats each as a distinct block with its own footprint on the cutting mat. The table below compares the three most common sleeves you will encounter in the first ten hours of play.
| Sleeve Type | Block Shape | Best Paired With | Fabric Cost |
|---|---|---|---|
| Cap Sleeve | Small half-disc | Sleeveless summer commissions, casual day dresses | Low — fits in leftover corner space |
| Short Set-In | Bell-shaped full block | Day dresses, picnic outfits, cotton commissions | Medium — needs its own row on the mat |
| Three-Quarter Bell | Elongated bell with flare | Evening gowns, royal commissions, velvet/silk builds | High — bell flare consumes extra yardage |
Cap sleeves are the easiest entry point because they tuck into otherwise wasted corner space, but they offer little coverage and can look unfinished on a formal commission. Short set-in sleeves are the workhorse of the early game — they pair with almost every fabric and most bodice silhouettes. Three-quarter bell sleeves are the most expensive, but according to the press kit description at Free Lives, the game encourages creative control "from simple summer dresses up to extravagant royal gowns," so learning the bell sleeve early pays off when the first royal commission lands on your calendar.
Skirt Block Selection
Skirt selection follows commission occasion more than fabric choice. A summer picnic commission almost always calls for an A-line that flares from the waist, while a royal gala benefits from a layered or pleated block that adds volume. The table below maps the most common skirt blocks to the occasions where they shine.
| Skirt Block | Silhouette | Best For | Pairing Note |
|---|---|---|---|
| A-Line | Gentle flare | Day dresses, cotton/linen commissions | Pairs well with cap or short set-in sleeves |
| Pencil | Narrow, straight | Office wear, structured wool builds | Needs a closely fitted bodice to avoid bulk at the waist |
| Pleated | Folded panels | Formal occasions, silk/velvet gowns | Eats the most fabric; leave room on the mat before placing |
| Circle | Full radial sweep | Royal balls, dramatic evening wear | Cannot be placed on grain; use bias orientation deliberately |
Each skirt block carries its own grainline arrow, and that arrow must be respected unless the block is specifically designed for bias-cut use. A circle skirt is the most common exception — its grainline is marked as "bias" and the pattern is meant to be rotated 45 degrees off the selvage. Failing to rotate a circle skirt on purpose is one of the most frequent rookie errors reported on the Steam Community Guides hub.
Pattern Placement on the Cutting Mat
Placement is where the bodice pattern goes from a flat block to a real fabric cut. According to the Steam store description, the loop is: design a dress, arrange the paper pattern, preview on a mannequin, then sew. The "arrange the paper pattern" step is what the Dressmaker cutting mat guide portion of the game teaches, and it is the step that decides whether your fabric ends up as a dress or as scrap.
The cutting mat in Dressmaker is a grid-based workspace where each pattern piece is dragged, rotated, and snapped to the fabric rectangle. The grid units correspond to the in-game measurement system, and the fabric rectangle has a fixed width and length based on the bolt you purchased at the fabric shop. Getting comfortable with this grid is the single biggest skill upgrade for new players — once you can read it, you stop wasting fabric.
Grid Reading and Grainline Discipline
The grid lines on the cutting mat are not decorative. The horizontal lines represent the weft (cross-grain), and the vertical lines represent the warp (straight grain). Every pattern piece carries a small arrow called the grainline marker, and that arrow must point vertically up the mat when the piece is placed. The table below summarizes the three grain orientations and their practical effects on the finished dress.
| Grain | Arrow Direction | Effect on Garment | When to Use |
|---|---|---|---|
| Straight Grain | Arrow parallel to selvage | Stable, predictable drape | Default for bodice, sleeves, A-line skirts |
| Cross Grain | Arrow perpendicular to selvage | Slight stretch, softer drape | Occasional use for sleeve caps and yokes |
| Bias | Arrow at 45° to selvage | Maximum drape and stretch | Circle skirts, bias-cut evening gowns |
Reading the grid also lets you spot wasted space at a glance. A bodice placed with 20 cm of empty fabric to its left is leaving free real estate that could host a cap sleeve or a small skirt panel. Experienced players reported in community testing that re-packing a layout to close those gaps typically saves between 10% and 18% of fabric per dress, which adds up across a full commission queue.
Placement Order Strategy
The order in which you place pieces affects the final fit more than most players expect. A bodice placed first acts as an anchor — every other piece is then positioned relative to its grainline and waist edge. A skirt placed first, by contrast, often forces the bodice into a cramped corner where its grainline gets bent. The recommended order is:
-
Place the center back panel along the fold line of the fabric.
-
Add the center front mirror panel directly opposite.
-
Slot the side front and side back pieces between them on the straight grain.
-
Position the sleeve block in the next clear row, aligned to its own grainline arrow.
-
Drop the skirt block into whatever space remains, matching its waist length to the bodice waist edge.
This sequence is the one used by the most efficient pattern-packers in early playtests, and it scales — even when a commission adds appliqué, lace trim, or a lining panel, the same anchor-first logic applies. For more detail on stacking multiple layers, the pattern layering guide walks through stacked layouts and the bias-vs-straight trade-offs in depth.
Fabric Pairing and Pattern Behavior
A pattern placed on the wrong fabric behaves differently than the same pattern on the right one. Cotton and linen are forgiving — they hold their shape, they cut cleanly, and they forgive a slightly off-grain placement. Silk and velvet, by contrast, exaggerate every mistake: a bodice placed 5 degrees off-grain on silk will visibly twist on the mannequin even when the seams are technically correct. Wool sits between the two extremes — structured enough to hold a silhouette, drapey enough to follow a body curve.
The five named fabrics on the official Dressmaker store page — cotton, linen, wool, silk, velvet — each respond to the bodice pattern in predictable ways. Choosing the right fabric for a given pattern placement is the difference between a dress that drapes and a dress that puckers.
Fabric-to-Pattern Compatibility
The table below ranks each fabric's compatibility with the most common bodice-and-sleeve combinations, based on player-reported behavior in the first weeks after launch.
| Fabric | Bodice Hold | Sleeve Drape | Skirt Behavior | Best Commission |
|---|---|---|---|---|
| Cotton | High — minimal stretch | Crisp cap, soft bell | Stable A-line, decent pencil | Day dresses, picnic commissions |
| Linen | High — slightly stiff | Structured short set-in | Strong A-line, weak drape | Summer workwear, casual orders |
| Wool | Very high — holds shape | Limited drape, strong set-in | Excellent pencil, structured pleats | Office wear, autumn commissions |
| Silk | Medium — drapes close | Excellent bell and flutter | Beautiful bias drape, slippery A-line | Evening wear, royal commissions |
| Velvet | High — heavy hand | Heavy bell, sculptural short set-in | Rich pleats, dramatic flare | Royal galas, formal events |
Reading the table from left to right gives a quick gut-check before placing a pattern. If a commission calls for a royal velvet gown with a bell sleeve, the heavy hand of velvet will support the bell shape, but it will also flatten a circle skirt if the pleated block is not used. Players experimenting with fabric swaps at the fabric shop should save their layout first, swap one fabric, and re-check the preview before committing to the cut.
When to Override Default Behavior
The defaults above cover maybe 80% of commissions. The remaining 20% — usually royal or themed orders — benefit from deliberate rule-breaking. A bias-cut silk bodice, for example, looks more fluid than a straight-grain one but is harder to align on the mat. A wool bodice paired with a silk sleeve creates a structured top with a flowing arm, which works for autumn-evening commissions where the customer wants warmth without losing movement.
These mixed builds are also where fabric cost climbs fastest. A wool bodice with a silk bell sleeve and a velvet skirt routinely consumes the most expensive bolts in the shop, so the Dressmaker pattern placement tips in the next section become essential to keep waste down.
Practical Pattern Placement Tips
The difference between a functional layout and a tight, fabric-saving layout usually comes down to a handful of repeatable habits. The tips below come from the most consistent patterns reported by early players and the three Steam Community Guides that exist at launch — most notably Seerolz's "Thing's I've Learned" thread, which is the closest thing to an official early-game tips list. The community discussion around measurement workflows at the Steam measurement guide discussion also points at sizing inputs as a common source of bodice-fit problems, which is why the tips below are written around making the bodice sit correctly the first time.
Five Placement Habits That Save Fabric
-
Anchor the bodice on the fold first. The center-back panel is the most likely to share an edge with the fabric fold, and placing it there eliminates the need for a mirrored duplicate.
-
Rotate before you drag. Dropping a sleeve block in its default orientation then trying to rotate it in a cramped space is the main cause of off-grain sleeves. Rotate first, then place.
-
Match waist edges last. The bodice and skirt waistlines should meet at a single horizontal line on the mat. If they don't, one of them is misaligned.
-
Read the grainline arrow on every piece, every time. Even pieces you have placed a hundred times. The muscle-memory trap is real, and one missed arrow ruins a cut.
-
Leave a margin. The grid shows the pattern outline, but cutting requires a seam allowance. Keep at least one grid cell of empty fabric around every piece.
These five habits do not need to be applied in order — they need to be applied every time. Each one addresses a specific failure mode that shows up in the player feedback threads. For a deeper breakdown of how layered layouts and bias orientations interact, the arranging pattern pieces tutorial is the natural next read.
Common Errors and Quick Fixes
The table below maps the three most frequent placement errors to their visible symptom on the mannequin and to the fastest fix.
| Error | Symptom on Mannequin | Quick Fix |
|---|---|---|
| Sleeve placed on cross-grain | Twist at the shoulder seam | Rotate sleeve 90° so its arrow points up the mat |
| Skirt waist longer than bodice waist | Pucker at the waist join | Re-measure both waist edges; re-place the longer piece |
| Bodice off-fold (no mirror) | Front panel sits off-center on the body | Move the CF panel to the fold line and re-mirror |
| Circle skirt on straight grain | Skirt hangs stiff instead of draping | Rotate 45° so the grainline arrow runs bias |
| Cap sleeve overlapping bodice | Underarm bulk visible on preview | Nudge the cap sleeve to the next clear row |
Each fix is a single action — rotate, re-measure, re-place. None of them require buying new fabric, which means mistakes are cheap to correct as long as you preview the mannequin before sewing. The preview step is the only point in the loop where a misaligned pattern can be caught without wasting a fabric bolt.
Frequently Asked Questions
What is the first piece to place when building a Dressmaker bodice pattern?
The center-back panel should go down first, placed along the fold of the fabric. Anchoring on the fold means you only need to cut one half of the mirrored piece, which immediately saves fabric and locks the grainline orientation for every other panel that follows. Once the CB is placed, the rest of the bodice builds outward in matched pairs.
How do I stop sleeves from twisting on the mannequin?
A twisting sleeve is almost always placed against the wrong grainline. The grainline arrow on the Dressmaker sleeve pattern must point straight up the mat, parallel to the selvage, before you cut. If the arrow is rotated 90° by accident, the sleeve will hang at an angle no matter how cleanly it is sewn. Rotate the block first, then drag it into place.
Can I use a circle skirt with a straight-grain bodice?
Yes, but the skirt must be deliberately rotated 45° so its grainline arrow sits on the bias. A circle skirt on straight grain loses the fluid drape that makes it worth the extra fabric in the first place. Pair the bias circle with a stable straight-grain bodice and the contrast in movement reads as intentional design rather than a fitting error.
What fabric is best for a first royal commission?
Velvet and silk are the two named fabrics most often used for royal commissions in the press kit description. Velvet holds the silhouette of a three-quarter bell sleeve and a pleated skirt beautifully, while silk drapes a bias-cut circle skirt into the dramatic flare that royal galas call for. Start with velvet if you want forgiveness; switch to silk once your layout confidence is high.
Does the cutting mat show seam allowances?
The grid on the cutting mat shows the pattern outline, not the seam allowance. You need to leave at least one grid cell of empty space around every piece so the cut fabric has room for seams. Players who ignore this margin find that their bodice pieces come up 5–10% short at the sewing machine, and the only fix is a fresh cut.