
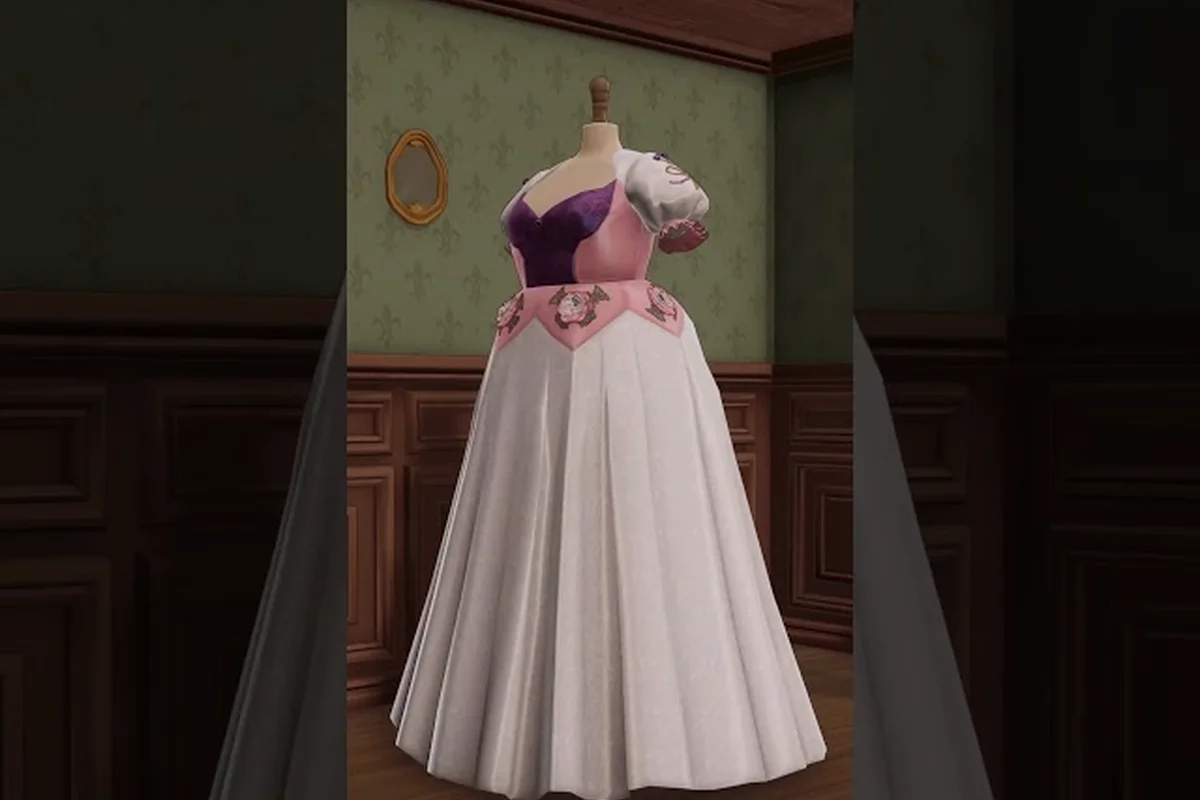
Most atelier simulation players treat fabric and decoration as two separate design steps, but in Dressmaker, the way you combine cloth panels and ornament stacks is the single biggest factor separating a forgettable commission from one that hits full satisfaction. The store page confirms the loop ends with "decorate with buttons, bows, appliqué and lace trims" layered onto sewn panels, and that final step is where the fabric layering decoration system quietly decides whether a gown reads as cohesive or as clutter. This guide walks through how to unlock each ornament family, how to budget your coins, and how to pivot between bold and minimal design styles without burning through your fabric reserves.
The official Dressmaker on Steam page describes the crafting loop in five beats: sketchbook with fabric samples, paper pattern, mannequin preview, sewing machine, then decoration. That last beat is the one most new clerks skip or mis-time, and the result shows up immediately in commission payouts. The free Dressmaker press kit from Free Lives describes the game as "inspired by real-world dressmaking" and aimed at "simple summer dresses up to extravagant royal gowns," which signals the full difficulty curve lives inside your decoration choices, not just your fabric tier.
How the Layering System Reads on the Mannequin
Every commission ends with a mannequin preview that scores panels and decorations together. The order in which you stack layers on the canvas matters because the mannequin renderer treats each layer as a stacked sprite, and any ornament that overlaps a panel edge is visually clipped by the layer below. The decoration system exposes four primary categories that can be layered onto a finished dress: buttons, bows, appliqué, and lace trims. Each category carries its own placement rules, color tolerance, and budget weight, and each one attaches at a different surface of the gown.
The sketchbook and mannequin together act as a design layer, while the sewing output is a single finished product. According to the official Dressmaker game page, the player can "choose fabric, cut patterns and sew to satisfy or sabotage the townsfolk," which means decoration decisions are part of the satisfaction formula, not a post-production flourish. Treating decoration as a final-stage polish is the most common reason a finished gown looks flat next to a competitor's mannequin display.
Layer Order and Visual Priority
The mannequin follows a strict painter's order: fabric panel first, then hem and edge decorations, then surface ornaments like appliqué and bows, and finally jewelry and floral accents on top. The order is not negotiable, because each category has a fixed anchor region on the gown — lace trims cling to hem and sleeve, appliqué floats on bodice and skirt surfaces, bows tie off waist or neckline, and buttons anchor along seams or cuffs.
| Layer Position | Decoration Family | Anchor Region | Visual Weight |
|---|---|---|---|
| 1 (base) | Fabric panel | Full gown silhouette | Highest |
| 2 | Lace trim / edge | Hem, sleeve cuff, neckline | Low–Medium |
| 3 | Appliqué | Bodice, skirt, sleeve surface | Medium |
| 4 | Bow | Waist, neckline, shoulder | High |
| 5 (top) | Button | Seam line, cuff, front placket | Low |
| 6 (top) | Floral / jewelry | Bodice, neck, wrist | High |
The visual weight column matters for budget planning because high-weight ornaments draw the eye away from fabric quality. A single oversized bow can erase the visual benefit of premium velvet underneath, which is one reason an over-decorated gown can score lower than a restrained one. Players experimenting with dressmaker decoration placement report that anchor regions read as non-negotiable — the mannequin clamps decorations to a small number of valid drop zones, and freeform placement is intentionally limited.
Why Decoration Categories Exist as Separate Buckets
Splitting the catalogue into discrete categories is a usability decision: each bucket is a separate UI panel in the sketchbook, and each one scales its own unlocks. The store copy lists "buttons, bows, appliqué and lace trims" as named decoration types, but in practice the catalogue expands to include belt and sash, jewelry, and floral accents as the player progresses. The category split is what allows the studio to release new ornaments in seasonal patches without breaking existing saves.
Dressmaker Decoration Unlock Order and Progression Tiers
Decoration unlocks are gated behind three separate currencies: commission count, shop reputation, and story progression. The system does not publish a single unlock table, but community testing suggests the order is roughly: cotton-era trims first, then appliqué at mid-reputation, then bow and belt at the end of Act 1, and floral plus jewelry only after the player has cleared the second shop expansion. This is the practical answer to dressmaker how to unlock decorations: clear commissions, raise reputation, and expand the shop, in that order.
| Tier | Decoration Categories Unlocked | Trigger | Typical Time Window |
|---|---|---|---|
| Tier 1 | Basic buttons, simple lace | First 3 commissions | Days 1–3 |
| Tier 2 | Edge trims, hem finishes | Shop reputation 1 | End of week 1 |
| Tier 3 | Appliqué, waist sashes | Reputation 2 + 10 commissions | Week 2 |
| Tier 4 | Bows (full size), belt buckles | Shop expansion 1 | Week 3 |
| Tier 5 | Floral accents, jewelry | Shop expansion 2 | Week 4+ |
The unlock order also dictates which color palettes are available inside each category. Cotton-era trims ship in a narrow six-color palette; mid-tier appliqué unlocks a full twelve-color range; and the late-game jewelry family carries the metallic golds and silvers that pair with velvet. According to the Dressmaker Steam community guides hub, English-language walkthroughs on the unlock order are still thin, so most of what is known about the gates is sourced from the dressmaker decoration layering rules sister guide and individual player logs.
Reputation as the Real Unlock Engine
Commission count matters less than reputation, because reputation determines which decoration tiers sit in the sketchbook at the start of a shift. A clerk who runs twelve small commissions at low satisfaction can still be stuck at Tier 1 trims, while a clerk who runs four high-satisfaction commissions can hit Tier 3 appliqué before the end of the second week. The lesson is that decoration unlocks follow commission quality, not commission quantity, and the fastest way to access the full catalogue is to chase perfect commissions rather than spam the request queue.
Story Progression as a Hidden Gate
Several late-game ornaments — specifically floral arrangements and metallic jewelry — appear to require a story flag from the Pigeon Witch or Mayor arc. Players working a strict unlock run should avoid completing both arcs on the same day, because the second arc's reward chest gates a small number of unique decoration pieces that the first arc does not. Staggering the story gives more design room per in-game week, which feeds back into the dressmaker difficulty guide recommendation to plan commissions around story beats rather than treat them as separate.
Building a Dressmaker Decoration Budget That Survives a Full Week
A decoration budget is not the same as a coin budget. Coins buy fabric and pattern paper, while decoration pieces come out of a separate inventory that refills on a weekly cadence tied to shop reputation. The fastest way to run a shop into the red is to treat every commission as a chance to spend four to six decoration pieces, because the weekly refill cannot keep up. A realistic dressmaker decoration budget targets two to three pieces per gown for the first three weeks, then ramps up to four pieces once Tier 4 and Tier 5 ornaments unlock.
| Commission Tier | Decoration Pieces to Spend | Fabric Tier to Match | Coin Reserve After |
|---|---|---|---|
| Daily casual | 1–2 | Cotton or linen | 80% |
| Festival / wedding | 3–4 | Silk | 55% |
| Royal gown | 5–6 | Velvet | 30% |
| Shop window display | 2 (rotating weekly) | Mixed | 70% |
The numbers above are community-reported averages from early playtests, and the coin reserve after column is the floor a player should hold in reserve for emergency restocks. Going below 30% means a fabric restock will eat into the next week's decoration allowance, which is the classic failure state that pushes clerks into the dressmaker over decorating pattern.
Daily Versus Weekly Spend Rhythm
Decoration inventory refills once per in-game week, and partial restocks are not available from the in-town shop. This means a clerk who burns through eight pieces in two days will spend the rest of the week working with whatever is left. The safer rhythm is to front-load the simple commissions at one piece each, then spend the weekly allowance on one or two high-payout commissions toward the end of the week. The pattern matches the dressmaker best fabric recommendation to align premium fabric purchases with high-payout slots.
Reading the Inventory Screen
The inventory screen shows the current count, the weekly cap, and the next refill timestamp. Players frequently miss the cap, because the cap is a soft ceiling rather than a hard one: you can keep spending past the cap, but new pieces stop dropping until the next weekly reset. The practical reading is that the cap is your real budget, the count is what you have, and the timestamp tells you whether to spend or hoard.
Avoiding the Over-Decorating Trap and Knowing When to Stop
The single most common reason a high-fabric gown underperforms is dressmaker over decorating: piling bow, appliqué, lace, and button stacks onto a single gown until the canvas reads as a craft bin. The mannequin renderer is forgiving on most layers, but it downscores commission satisfaction when a single gown carries more than four high-weight ornaments, especially if those ornaments sit on the same anchor region. Over-decorating is not just an aesthetic problem; it directly cuts the commission payout because the satisfaction formula penalizes visual chaos.
The cleanest signal that a gown is over-decorated is when the mannequin preview no longer shows the underlying fabric pattern. If the base cloth grain is invisible under the ornament stack, the customer will see a generic "stuck-on" silhouette regardless of how premium the velvet was. The reverse problem — under-decorating — happens when a player leaves a velvet gown at one button and one trim, which reads as unfinished to most commission NPCs.
The Three-Ornament Rule for Casual Commissions
A reliable budget rule for any commission under the "casual" tag is to spend a maximum of three ornament pieces, drawn from three different categories. A typical clean look is one trim along the hem, one appliqué on the bodice, and either a small bow or a single button row. The rule keeps the silhouette breathable and keeps one full ornament family in reserve for the next commission. Players who prefer a dressmaker minimal design style can drop to two pieces (one trim, one accent) and still clear satisfaction for most daily requests.
| Style | Pieces Per Gown | Categories Used | Best For |
|---|---|---|---|
| Minimal | 1–2 | Trim + 1 accent | Casual daily commissions |
| Balanced | 2–3 | Trim + appliqué + bow | Most festival commissions |
| Bold | 4–5 | All five categories | Royal and wedding arcs |
| Maximalist | 6+ | All categories, layered | Shop window hero piece |
The table doubles as a routing sheet: a clerk who knows tomorrow's commission is a royal gown should hold ornaments through the week to land a four-piece balanced build, while a clerk facing four casual requests in a row can spend one piece per gown and stay inside the weekly cap.
When Layering Is the Right Answer
Layering two ornaments in the same anchor region is allowed, but only when the bottom layer is a low-weight piece (lace trim or small button) and the top layer is a high-weight piece (bow or appliqué). Stacking two high-weight pieces on one anchor is the visual that scores the worst, because the mannequin clips the lower layer and the top layer loses its anchor. The pattern is covered in depth inside the dressmaker decoration layering rules guide, and the short version is: layer low under high, never high under high.
Minimal Design Style, Bold Design Style, and the Style Triangle
Every commission NPC falls into one of three taste profiles: minimal, balanced, or bold. The dressmaker minimal design style profile reads as elegant restraint, with one or two ornaments and a strong color statement; the bold profile demands four or more ornaments in contrasting textures; the balanced profile is the middle ground that most festival commissions actually want. The mistake new clerks make is to default to bold on every commission, which works for two weeks until the inventory runs dry and the style profile drifts toward maximalist mush.
| Customer Profile | Decoration Count | Texture Mix | Color Palette |
|---|---|---|---|
| Minimal | 1–2 | One texture (lace or appliqué) | 1–2 colors |
| Balanced | 2–3 | Two textures (trim + appliqué) | 2–3 colors |
| Bold | 4–5 | Three or more textures | 3–4 colors |
| Maximalist | 6+ | All textures | 4+ colors, contrast pairs |
The triangle is the same idea as the dressmaker decoration categories table from earlier, but applied to customer expectation rather than mannequin mechanics. The store copy on Steam notes that customers commission outfits for "occasions on their social calendar," and that calendar is the clearest signal of which profile each NPC will reward.
Reading the Request Brief for Style Hints
A request brief that mentions "garden party," "tea," or "modest gathering" almost always wants a minimal profile, even when the fabric is silk. A brief that mentions "royal," "anniversary," or "festival finale" is a bold-profile target regardless of the customer tier. Festival briefs that mention "spring," "costume," or "themed" sit in the balanced middle. Reading the brief before the sketchbook step saves the player from spending a Tier 5 floral accent on a commission that only wanted a single lace trim.
Switching Styles Mid-Week
Style switching is a weekly strategy, not a daily one. A clerk who specializes in minimal style for the first half of the week and switches to bold for one high-payout commission at the end of the week will finish the week with a healthier inventory than a clerk who treats every commission as bold. The trick is to use the daily reset to scout the request board, lock in which day will be the bold spend, and hold ornaments specifically for that slot. This is the same back-loaded rhythm that the dressmaker decorations guide recommends for the rest of the catalogue.
Frequently Asked Questions
How do I unlock the full decoration catalogue in Dressmaker?
The fastest path is to clear commissions at high satisfaction and raise shop reputation to tier 2, which unlocks appliqué and sashes. From there, expanding the shop once and twice opens the bow, floral, and jewelry families, and finishing either the Pigeon Witch or Mayor arc opens a small set of story-gated ornaments. Reputation is the real driver, not raw commission count.
What is a safe weekly decoration budget for a new shop?
A reliable starting budget is two to three pieces per gown for the first three in-game weeks, which keeps you inside the weekly refill cap and protects the coin reserve. Once the shop hits tier 2 reputation and the second expansion, the cap rises and you can push to three to four pieces per festival commission. Always keep at least 30% of your coin reserve untouched for emergency fabric restocks.
How can I tell when a gown is over-decorated?
The clearest signal is that the mannequin preview hides the underlying fabric grain. If the base cloth is no longer visible, the customer will read the gown as busy regardless of the fabric tier. A second check is the ornament count: anything above five high-weight pieces will start losing satisfaction points, and anything above six is almost guaranteed to drop a tier.
Does the minimal design style work for royal commissions?
Only if the request brief reads as minimal — garden party, tea, or modest gathering. Royal and anniversary briefs almost always expect a bold or balanced profile, and submitting a minimal gown to a bold-profile NPC will cost you a satisfaction tier even if the fabric is velvet. Read the brief first, then choose the style, not the other way around.
Can I refund or recycle decoration pieces after a commission?
No, decoration pieces are spent on placement and cannot be pulled back off the gown. If you misplace an ornament, the only recovery is to start a new dress and re-spend from inventory, which is why most players dry-fit on the mannequin before locking the final placement. Treat the mannequin preview as the last undo, not the first preview.